
[quads id=1]
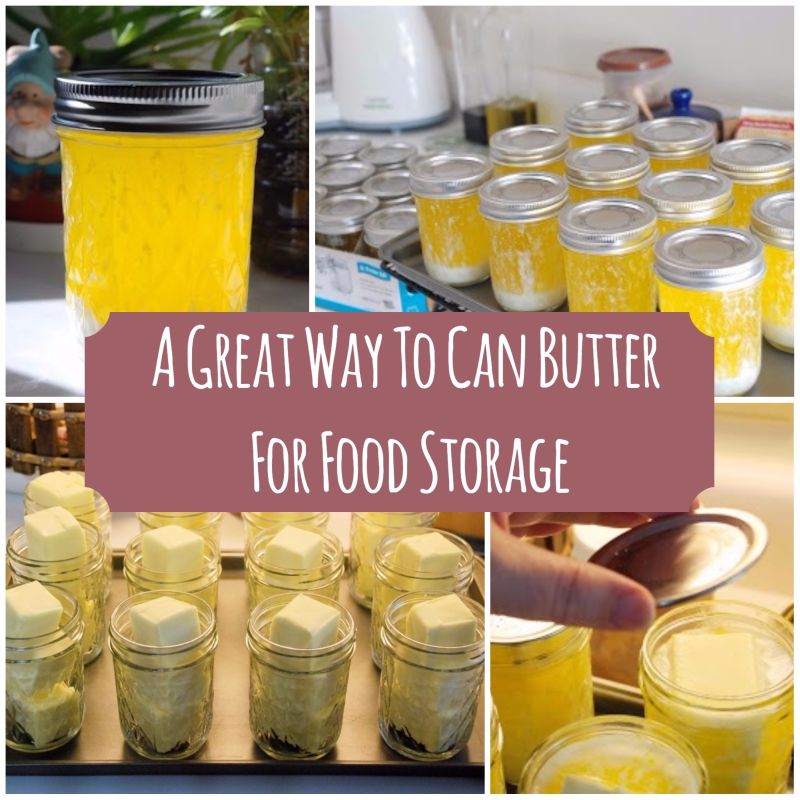
Stocking up on essentials when the prices are good is a smart thing. Many people choose to do it, but there are also some inherent challenges in dealing with your surplus before you need it. Butter is a great example. It can be very costly, but if you watch the sales, you can really stock up when the prices are good. You might choose to freeze your excess butter until you need it, but your freezer storage may also be limited. In that case, perhaps you would want to consider canning the butter.
[contentad widget=”368018″]
What? You didn’t know that you could can butter? Don’t feel badly, I didn’t either. Those of us who can know that there are some things we can, and some things we simply cannot. Fortunately, butter is able to be canned.
If you can it, you can store it for up to three years! That is a long time to keep a needed staple safe and usable! You aren’t limited to using canned butter for only cooking, it can be used for cooking as well as eating.
In order to can butter, you will go about it in a different way from how you might can the produce from your garden. You don’t even need the same equipment. You just will need to be prepared to use your oven in the two step process. The need for a two step process is due to the requirement of using not just one stick of butter in each jam jar. If you follow this process, you can have shelf stable butter for up to three years, or however long you can make your supply last before you use it up!
Take a look at teresatronierphotography.blogspot.co.uk to find the directions and try it out for yourself!
[quads id=2]
One evening at church one of the ladies mentioned that you could bottle butter and store it for 3 year. I hadn’t seen so many women interested in a comment about preserving food in a long tim. I received the instructions from her and have been bottling butter for my food storage ever since.
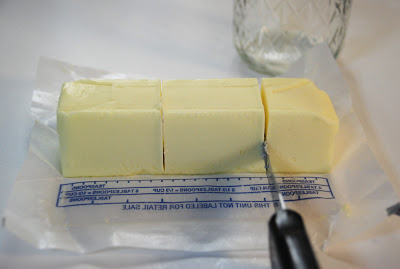
Items you need:
12 – 8 oz. jelly jars, lids, and rings (clean and sanitize bottle prior to bottling butter)
5–¼ pounds butter or margarine (5 pounds + 1 stick)
1 cookie sheet (optional)
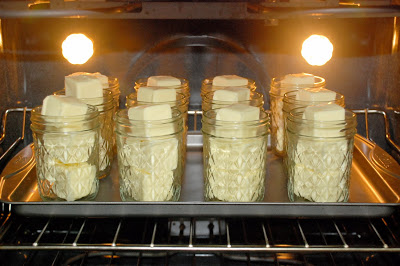
1 cooling rack (optional)Getting started:
Sterilize your jars and lids. (I wash my jars in the dishwasher on the sanitize setting and boil my lids like normal. I am into machines doing most of the work.)
Place your twelve jars on a cookie sheet. (This makes it much easier to handle the jars; instead of putting the jars in the oven and then taking them out individually.)
Preheat oven to 225°F.
Phase One:
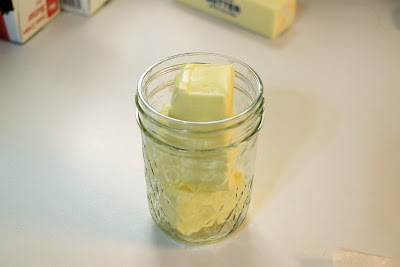
Open up twelve sticks of butter and cut each stick into two – three tablespoons sections and one – two tablespoons section.
Drop the two – three tablespoons sections in the bottom of the jar length wise.
Then very carefully place the one – two tablespoons section in the middle on top. The butter will stick up a little above the rim.
(Do this with all twelve jars.)
Put your jars in the oven at 225°F for 15 to 20 minutes.
Phase Two:…

Read the rest of the article at: http://teresatronierphotography.blogspot.co.uk


